Showing posts with label Thrilling Thursday's. Show all posts

Thursday, June 2, 2011

DIY Dining Room Chair Makeover!!

So, as I have alluded to in previous posts, I decided (rather quickly) to re-upholster my dining room chairs. They are our everyday chairs, as we have a large great room which encompasses our dining area, kitchen and family room (aka "great room"), so you see them everyday. And everyday for the last year I have been reminded that those chairs need to be recovered. You see this very lovely cat, Gizmo (who we had to say good bye to this time last year, as he was sick and had lost bladder control, in addition to peeing blood), did a number on our chairs. No, lucky for us he didn't pee on them, but he had this problem with his back claws (he was front declawed for this very reason), he didn't know how to put his back claws in, so I have poke holes in all my furniture, especially my dining room chairs, as he loved to chill on them. Hiding in plain view we'll say.

Gizmo relaxing in the sun at our old house in our bay window seat

So, on Saturday, while Hannah napped and Eric was helping his grandparents I went and found myself a screwdriver and the staple gun and set to work on revamping my chair covered (unannounced to my hubby - boy was he thrilled when he got home and saw me operating the staple gun - let's just say there have been previous disaster with that thing.... I can never remember which end the staple comes out of.... pathetic I know). Anyways, a couple of weeks ago I was perusing fabric.com and found a fabric I LOVED, and although the shipping to Canada isn't that great, after looking at local stores and finding nothing that compared, or that I even liked, I decided to bite the bullet and clicked order. It took just over a week to get here, and I wasn't planning on doing it right away, but then I had some time to myself Saturday afternoon, and thought what the heck, what have I got to lose. This is a shot of the fabric we chose along with the before of the chair pad, you'll notice the nice poke holes:


And here's a shot of our chairs before:
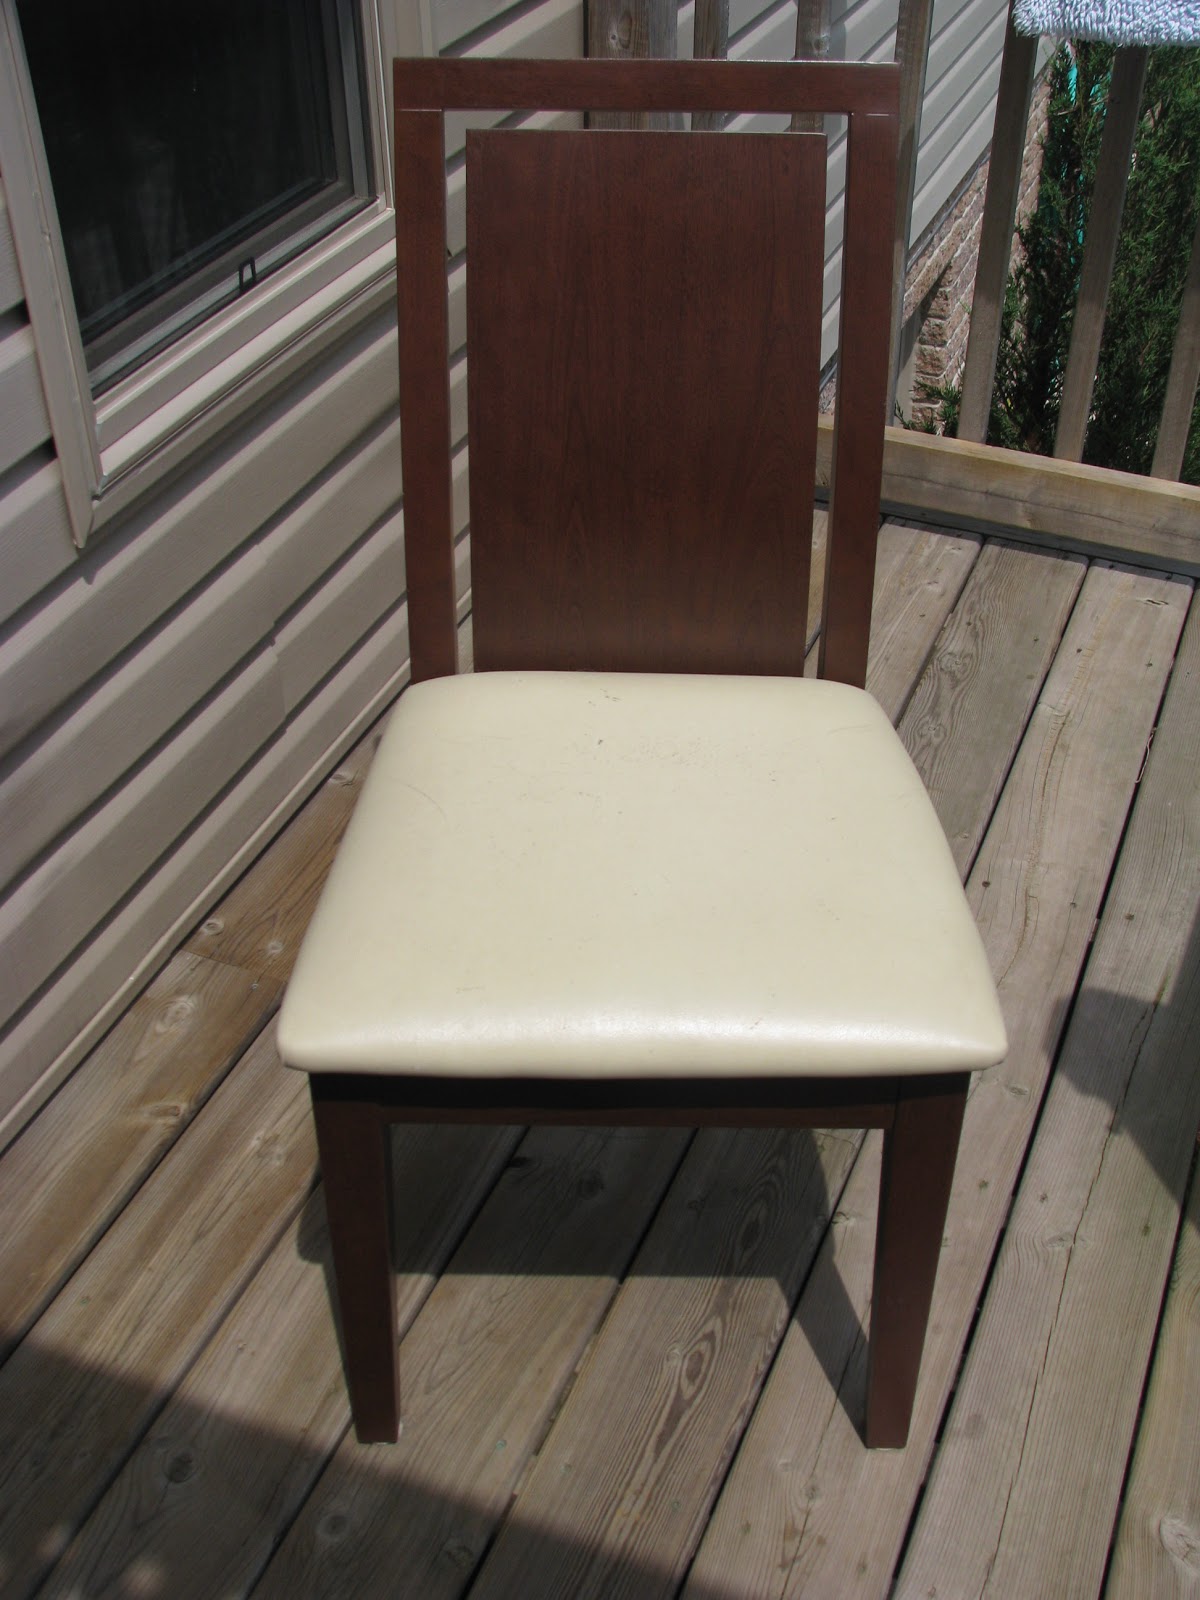


And this is how I did it:
  1. Lay out the fabric to establish the size of the piece you need to cut, be sure to cut it large enough to generously wrap over the edges of the chair (I had three inches on each size which may have been slight overkill, but I was also working with the potential for a large margin of error LOL)
  2. Unscrew chair pads from chair frame, I imagine a drill would have been handier for this, but my hubby had his with him.
  3. I was also covering my chairs in clear vinyl over the cotton fabric I selected as I have a two year old and we all know how messy they are. So I also had to measure out the vinyl fabric and cut it into squares, but if you don't have children feel free to skip this particular step.
  4. Since I was using a cotton fabric, I had to iron all of the squares I had cut out prior to putting them on the chair, as I'm sure you can see they were quite wrinkly. Ironing was a breeze though, not how I remember ironing ever going, so that only took about 2 mins a square, and I did one square at a time, so were all freshly pressed.
  5. Now the fun part begins, stapling the fabric to the chair, although I am proud to say I only had one staple go in backwards (because I was holding the staple gun the wrong way), so I started at the back of the chair pad (the part that tucks into the frame of the chair - figuring if I screwed up it would be well hidden), and pulled the fabric REALLY tight, and stapled in the center then the sides. Then I stapled the opposite end of the chair pad (where your legs go), again holding it really tight, leaving the corners to be dealt with at the end, because they are trickier. So then I stapled the center of the sides, and got to work on the corners. This part would probably be easier with two people I've decided, but since my hubby wasn't home, and may or may not have supported my fabric selection I decided to continue on my own rather then wait til he got home. So, I held with one hand really tight on the corner and stapled with the other, and just continued along the fabric working out the wrinkles as best I could. Then I repeated the whole process with the vinyl, which I'll tell you was a lot trickier then the cotton, and a lot thicker too. Repeat this whole process six times (as I have six chairs).
  6. The next step is re-attaching the chair pads to the chair, and this is where I hit a hurdle, you see, I couldn't get the screwdriver to drive the screws through the freshly installed vinyl, so I had to wait for Eric to get home and use the drill. Which worked like a charm, although he wasn't thrilled (as I suspected he wouldn't be with my fabric selection, however, he doesn't have the best taste when it comes to home decorating...
So, the whole process took about 2 hours, give or take, but all in all the time of a two year olds nap. She woke up just as Eric started the drill, go figure, but kinda perfect timing. So here's the finished product:


Looks great eh? We have been looking for a storage ottoman for quite sometime and I had seen one I loved over that was similar to this fabric (but was way too much money and my hubby nixed it right away), so I figured I'd incorporate it my own way, and within a reasonable budget. Here's a breakdown of how much this cost me:

Supplies:
  • staple gun and staples (which I needed a lot of...) - free already owned
  • screwdriver (again already owned)
  • drill (already owned)
  • 4 yards of fabric with shipping (and I didn't need 4 I totally could have got three but now I can make some throw pillows or something) $56.00
  • Roll of vinyl which was three yards and I needed every inch of it $15.96
So the total cost of the project was $71.96, which divided by six chairs is only $11.99, which I think is pretty good, and I love the finished product!!! What do you guys think?

Amy

And this is my Thrilling Thursdays link up!! So be sure to head over to Paisley Passions and see what everyone else has made today!!


Thursday, April 21, 2011

Budget Busters- A Breakdown of the costs of our recent reno's room by room!!

Breakdown of the supplies needed for the Rustoleum Cabinet Transformations Reno's

We bought 4 kits, but soo far have only used three, so I am not factoring in the expense of the 4th kit...

Rustoleum Cabinet Transformations - $79.99 x 3 = $239.97
Paint brushes - Home Depot - (2 x 2" @ $9.98 each, and 1 x 1.5" @ 5.98) = $25.94
Foam Brushes - Canadian Tire - 2pkgs of 30 (we could have only used one but since we opened both of them and can't return one I am including them both) - 2 @ $2.99 = $5.98
Drop Clothes - Dollarama - 8 x $1.00 = $8.00
Cups - Dollarama - 2 x $1.00 = $2.00
Rubber Gloves - 2 x $1.00 = $2.00
2" Painters Tape - 4 roll pack $12.99
Lint Free Rags - 4pk - $1.49 x 4 = $5.96
Labour - free we did it ourselves, and couldn't be prouder....

Total Cost for Rustoleum Cabinet Transformations Product and Installation  302.84 plus 13% tax here (even though we bought the kits in the states, I am still adding tax onto it because I'm not sure what the tax rate is in the United States...)

So the grand total is a whopping :    $342.21

Now, divide that by 5, as we did 5 separate "projects" with it and you get $68.44.

Now I will breakdown the costs of the various projects:
                 
  1. Main Floor Bathroom Vanity -
      $68.44 - Rustoleum divided cost (with supplies and installation)
      $15.00 - New Handles purchased off Ebay - for 2.50 a piece
           Total = $83.44

 2. Master Bedroom Bathroom Vanity -
      $68.44 - Rustoleun divided cost (with supplies and installation) and furthermore, we re-used the handles off the kitchen cupboards, so there was no added cost
                                                                      Total = $68.44

3. Pantry, and two wooden chests (in great room) -
       $68.44 - Rustoleum divided cost (with supplies and installation) also no further cost
                                                                       Total = $68.44

4. Queen size bedroom set, with two armoire dressers, large nightstands, and a headboard
     $68.44 - Rustoleum divided cost (with supplies and installation)
     $  9.59 - Rustoleum Satin nickel spray paint-to spray paint the existing ugly brass handles
                                                                         Total =$78.03

5. Kitchen Cabinets
     $68.44 - Rustoleum divided cost (with supplies and installation)
     $60.00 - New handles purchased off Ebay for $2.50 a piece x 24
     $33.89 - Wireless undercabinet lighting purchased at Costco
     $18.08 - Casing trim mounted on the bottom of the upper cabinets (to hide lighting and achieve a finished look)
                                                                          Total =$180.41

So, there you have it my budget busters in a room by room fashion for our recent reno's. I think we did really well at keeping the costs down, and I feel like the reno's were well worth the money we spent, and the work we did too. We are very pleased with the results. Stay tuned for a breakdown of our flooring costs and recent closet and pantry makeover budgets.


P.S - I'm linking up with Paisley Passions Thrilling Thursdays, head on over here and link up...

Amy

Thursday, April 14, 2011

Thrilling Thursday!!

Today I am linking up with Paisley Passions for Thrilling Thursday. So head on over to her blog and check out fellow bloggers' Thrilling Thursday's.


And, of course this Thursday, the thing I am most thrilled about is my kitchen redo, so click to see what it looked like before, how we did it, and what it looks like now.

Stay tuned later today I will be posting the after pics of the main bathroom vanity, and asking your opinion about my design dilemma.....

Amy

Thursday, March 31, 2011

Thrilling Thursday!!!

Sorry about how late my post is again today, I've had a very long, bad day, and am trying to process some information, so again I apologize for the skimpy content.  I am linking up with Paisley Passions Thrilling Thursday's and today is going to focus around this gorgeous necklace I made for Alison. She won it over at Life As I Know It!!!


We are gearing up for installing our new flooring in our great room, this weekend, so stay tuned tomorrow for the before pics!!! Hope everyone's having a great night!!

Amy

Thursday, March 24, 2011

Spring Cleaning To Do List

With the arrival of spring, we I have decided to make myself a list of the things that I would like to/ need to get accomplished this spring. Now mind you my spring cleaning is going to be happening a little bit later this year with all our upcoming renos (that you can read about here) but there are certain things that we can get started on right away!!
So here's my list so I can keep myself accountable for the things we would like to get done this spring:
  • Organize bedroom closets
  • Organize craft room and make some sense of it - this may include photographing more jewelry to get posted on here, but we shall see
  • Gather my income tax stuff (which needs to be happening ASAP)
  • Go through my tupperware and discard and mismatched stuff
  • Organize crawl space (it's a disaster)
  • Organize Hannah's play room
  • Plant peony's I purchased outside
  • Order dirt and mulch to be delivered for our gardens
  • Clean out shed
  • Clear out under the deck storage area (which will include pulling out Hannah's summer toys and pressure washing them all off)
  • Get out patio furniture and swing
  • Organize the office
  • Wash the inside and outside of all my windows (we live in an area where there is lots of new construction so they never really look clean despite being brand new)
Add all that to my evergrowing reno list for the next couple of weeks and we are going to be super busy. But I look forward to the feeling of it all being done. So stay tuned and see what we get accomplished. What's on your spring cleaning list? Is it as lofty as mine? Today I'm linking up with Paisley Passions Thrilling Thursday's, so head on over and check out what she's got going on!!


-Amy

P.S - Don't forget to head over to Life As I Know It, for a chance to win your favorite piece of my very own handcrafted jewelry. Entry is really simple, all you have to do is follow the blog and then tell us which one is your favorite necklace, and the winner will be drawn randomly. So head on over here and check it out

LinkWithin